
Overview
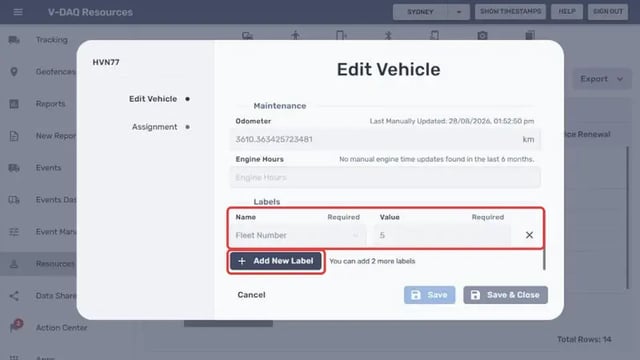
Labels add your own identifiers to a vehicle, such as a fleet number or plant number. Each label has a Name (the label type, for example Fleet Number) and a Value (for example 5). A vehicle can carry up to five labels.
Before You Begin
- You need access to the V-DAQ Platform.
- The label must already exist in Resources > Labels. If it doesn't, follow Create or remove a label first.
Important
The window shows how many more labels you can add, for example You can add 2 more labels.
Step 1 – Open the vehicle
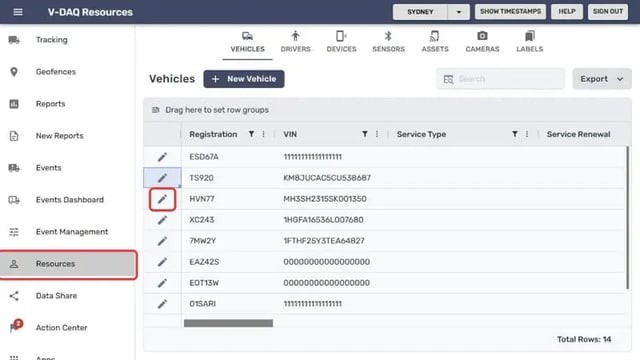
Select Resources in the left menu. The Vehicles tab opens.Select the pencil icon next to the vehicle.
Step 2 – Go to the Labels section
In the Edit Vehicle window, scroll down to Labels. Existing labels show with their Name and Value.Select Add New Label to add another label.
Step 3 – Choose the label and enter a value
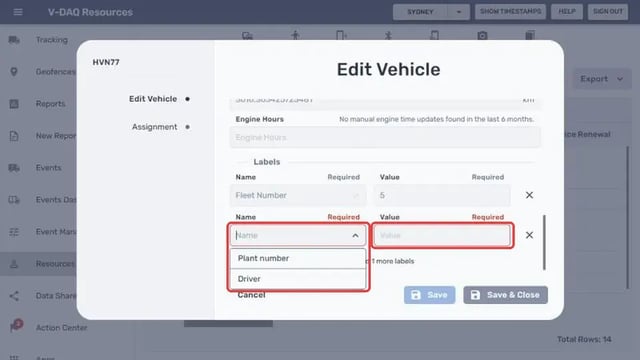
Select the new Name field and choose a label from the list.Enter the identifier in Value.
Step 4 – Change or remove a label (optional)
To change a label, update its Value.To remove a label from this vehicle, select the X at the end of its row.
Step 5 – Save your changes
Select Save & Close.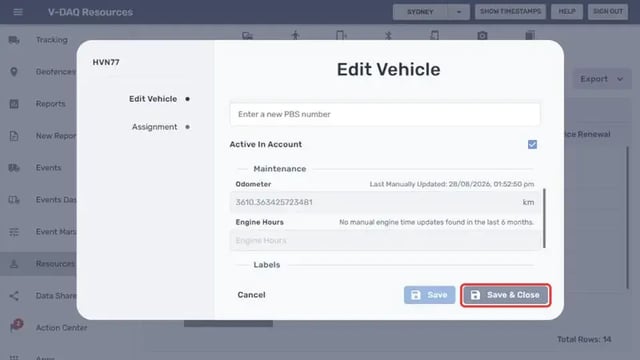
Related Articles
Need More Help?
If you're still experiencing issues:
Phone: (02) 4204 8472
Email: support@v-daq.com.au