
Overview
Assigning a driver links that driver's name to the vehicle, so trips and reports show who usually drives it. Each vehicle has one assigned driver at a time. You set the driver on the Assignment tab of the vehicle's edit window.
Before You Begin
- You need access to the V-DAQ Platform.
- The driver must already be set up in Resources > Drivers and marked Active In Account. If they are not in the list, follow Create or remove a driver first.
Important
Only active drivers appear in the Driver Full Name list.
Step 1 – Open the vehicle
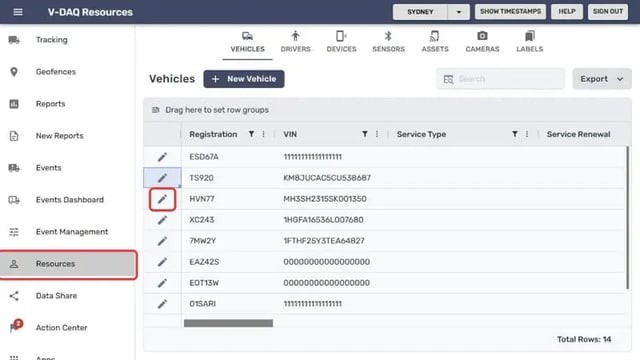
Select Resources in the left menu. The Vehicles tab opens.Select the pencil icon next to the vehicle.
Step 2 – Open the Assignment tab
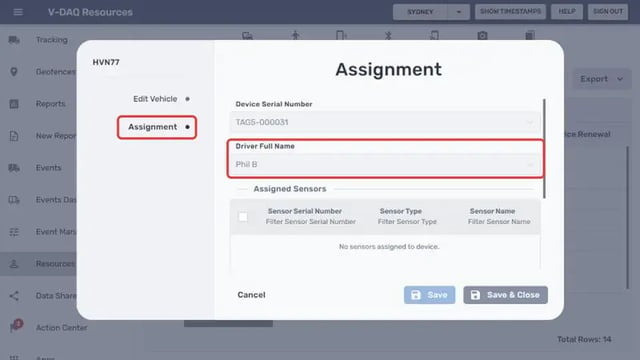
In the edit window, select Assignment on the left.Find the Driver Full Name field.
If you have unsaved changes on the Edit Vehicle tab, a Save Changes message appears. Select Save to keep them or Discard to drop them.
Step 3 – Choose the driver
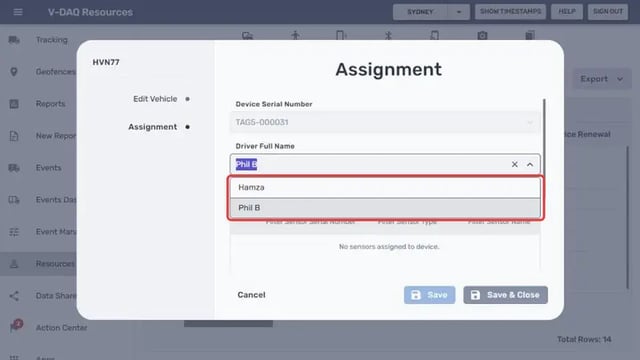
Select the Driver Full Name field,Select the driver from the list.
Step 4 – Remove a driver (optional)
To remove the assigned driver, select the X in the Driver Full Name field.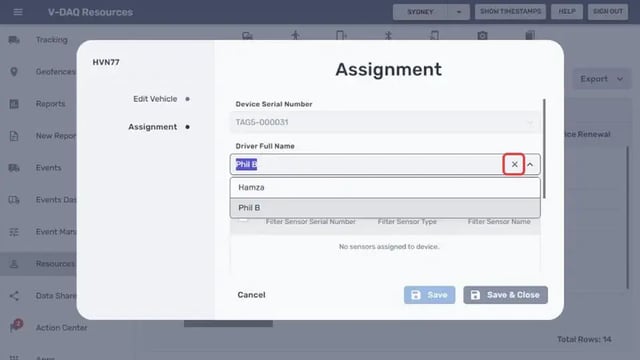
Step 5 – Save your changes
Select Save & Close.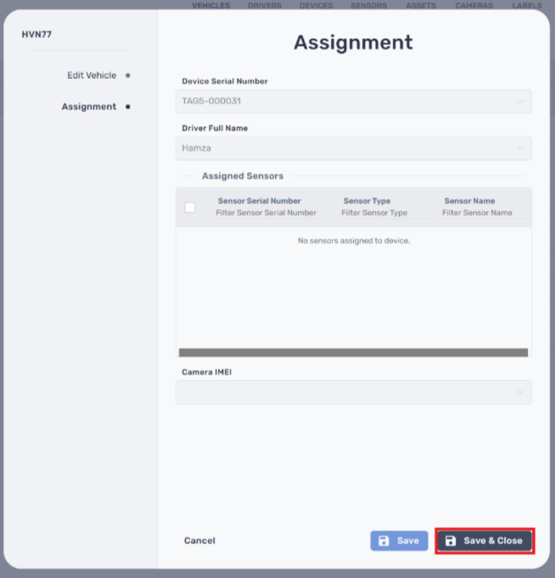
Related Articles
Need More Help?
If you're still experiencing issues:
Phone: (02) 4204 8472
Email: support@v-daq.com.au