
Overview
Installing your V-DAQ TAG3 (TAG3036) is simple. You'll stick it to the windscreen, connect it to ignition power with the V-DAQ Hardwire Kit, and run a quick check to make sure it's working.
This guide walks you through each step. Most installs take around 30 minutes, plus a short drive at the end.
Before You Begin
Before you start, make sure:
- You have your TAG3 and the V-DAQ Hardwire Kit that came with it.
- You know where the vehicle's fuse box is.
- You have the vehicle manual, or another way to find a fuse that only has power when the ignition is on.
- The TAG3 will have a clear view of the sky through the windscreen.
- You can switch the ignition on and off during setup.
- You have our Support team's details handy in case you need a hand.
Important Information
- The TAG3 needs to be connected to ignition power, not a constant or accessory power circuit.
- Please use the Hardwire Kit supplied with your TAG3. TAG3 kits don't work with the TAG5.
- If your TAG3 looks damaged, please don't install it. Contact us and we'll sort out a replacement.
- If you're unsure about any step, our Support team is happy to help.
Step 1 – Attach the TAG3 to the Windscreen
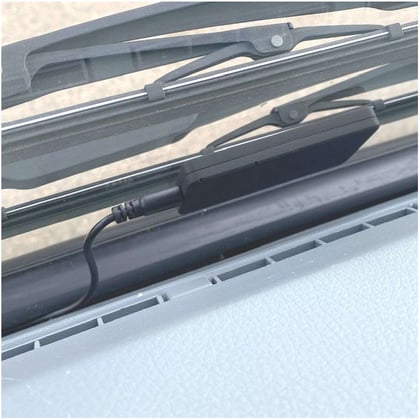
Choose a spot at the bottom of the windscreen on the driver's side (right), where it won't block the driver's view. Keep it at least 1 cm from the windscreen pillar, with the cable pointing down.
Clean and dry the glass, then remove the two adhesive strip covers from the back of the TAG3.
Press the TAG3 firmly onto the windscreen with the V-DAQ logo facing up and readable.
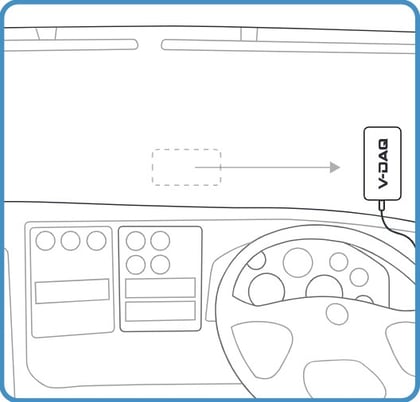
For the best signal, keep the TAG3 clear of:
- Metal stone guards or sun visors.
- Metallic stickers or metallic window tint.
- Wiper arms.
Plastic and fibreglass covers are fine. Please don't mount the TAG3 face down on the dashboard or under it.
Step 2 – Install the Hardwire Kit
Find a fuse in the fuse box that only has power when the ignition is on. Your vehicle manual usually lists these as engine or ignition circuits.
Choose the fuse adaptor from the kit that suits your vehicle's fuse type, and fit it to that fuse position.
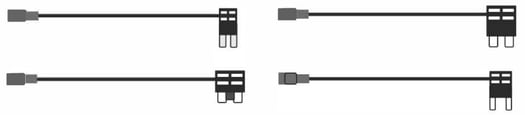
Connect the ground plug to a bare metal point on the vehicle chassis.
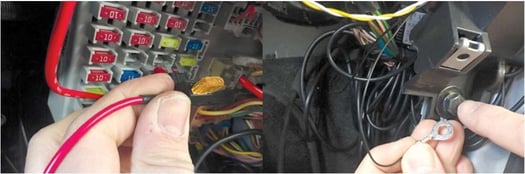
Check the Hardwire Kit cut-off voltage is set to 11.8V (12V vehicles) or 23.6V (24V vehicles). This is the factory setting, so you usually won't need to change it.

Run the cable behind the dashboard from the fuse box to the TAG3 on the driver's side of the windscreen.
Take care not to force any connections.
Step 3 – Connect the TAG3
Choose the Micro USB (Micro-B) adaptor from the kit.
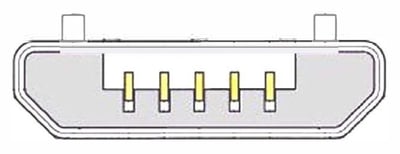
Connect the Hardwire Kit cable to the TAG3 using the Micro USB adaptor.
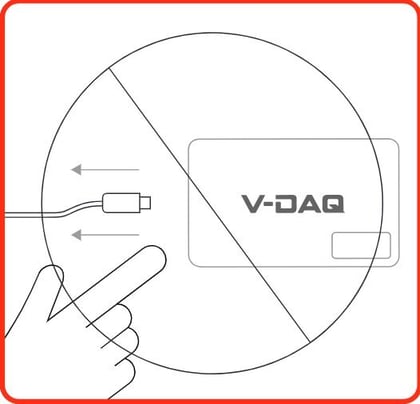
Make sure the cable is pushed in fully and sits securely.
Step 4 – Turn the Ignition On
Make sure the vehicle is parked outdoors (not under cover), then switch the ignition on.
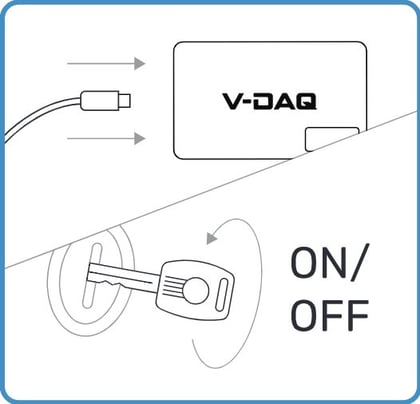
You should see:
- The TAG3 lights come on within a few seconds.
- Light 1 starts flashing.
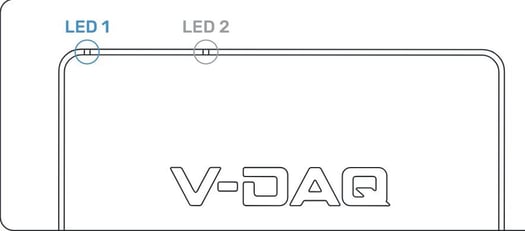
You'll find the two green lights at the top left of the TAG3 (with the logo the right way up).
Step 5 – Check the TAG3 Lights
It can take a few minutes for the TAG3 to find mobile and GPS signal, so don't worry if it isn't instant.
- When everything is working, light 1 flashes and light 2 stays on.
- If the lights don't match the table below after 10 minutes outdoors, give our Support team a call.
| Light 1 | Light 2 | What it means |
|---|---|---|
| Off | Off | No power |
| On | Off | Turning on |
| Flashing | Off | Searching for mobile and GPS signal |
| Flashing | Flashing | Weak mobile or GPS signal |
| Flashing | On | Working normally |
| Fast flashing | Off | Firmware update in progress. Keep the TAG3 powered. |
| Flash, pause, repeat | Off | Device error. Please contact our Support team. |
Step 6 – Turn the Ignition Off
Switch the ignition off. The TAG3 lights should turn off, which shows it's correctly connected to ignition power.
If the lights stay on, the kit is on a constant power circuit. Just move the fuse adaptor to a fuse that only has power with the ignition on.
Step 7 – Take a Short Drive
Drive the vehicle, or leave the engine running outdoors, for at least 15 minutes.
This gives the TAG3 time to finish setting up and send us the information we need.
Step 8 – We'll Check Your Installation
Once you've finished the drive, we'll check everything is working.

We make sure the TAG3 is reporting power, ignition and location data correctly.
We'll let you know once your installation is confirmed. Please leave the TAG3 connected from now on.
Troubleshooting
| Issue | Possible cause | What to do |
|---|---|---|
| TAG3 lights don't come on | Power connection issue | Check the ignition is on and the fuse position has power. Make sure the fuse adaptor, ground plug and USB connections are secure. |
| TAG3 still has no power after checking connections | Cut-off voltage setting or faulty kit | Check the cut-off voltage is set to 11.8V or 23.6V. If the TAG3 works from a cabin USB port but not from the kit, contact us and we'll send a replacement kit. |
| Lights stay on with the ignition off | Kit connected to constant or accessory power | Move the fuse adaptor to a fuse that only has power when the ignition is on. |
| Light 1 flashing and light 2 off or flashing for more than 10 minutes | Poor mobile or GPS signal | Move the vehicle outdoors. Check nothing metal blocks the TAG3, and try another spot on the windscreen if needed. |
| TAG3 cuts out while driving | Unstable vehicle power | Have an auto electrician check the vehicle battery and charging system. |
| No installation confirmation yet | The vehicle hasn't completed the 15-minute drive | Drive the vehicle, or leave the engine running outdoors, for at least 15 minutes. Then allow a little time for us to check. |
Removing the TAG3
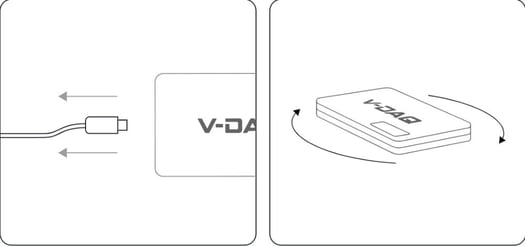
If you need to remove the TAG3, disconnect the power cable first.
Then twist the TAG3 slowly and firmly to release the adhesive. Please don't pull it straight off the glass or lever it off with tools.
Related Articles
Need More Help?
Need a hand? Our Support team is here to help.
Phone: (02) 4204 8472
Email: support@v-daq.com.au