
Overview
You draw geofences directly on the map using Smart select, Circle or Polygon. You can rename or delete a geofence at any time from the list.
Before You Begin
Before you start, make sure you have:
- Access to the V-DAQ platform.
- Permission to manage geofences in your account.
Important
The Geofences page described here is the new map editor. If your platform still shows the older geofence table, these steps will apply once the new editor is released to your account.
Create a Geofence
Step 1 – Open the Geofences Page
Select Geofences in the side menu.
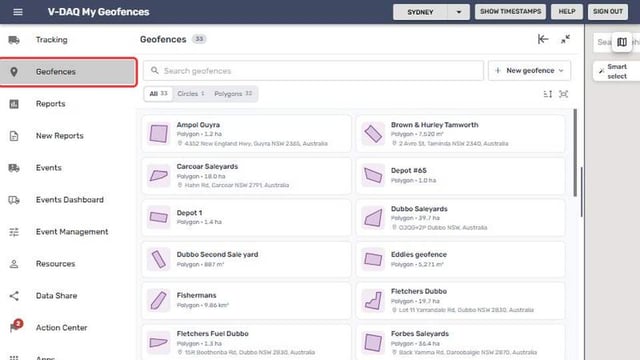
Step 2 – Start a New Geofence
Select New geofence, or use the drawing toolbar at the top of the map.
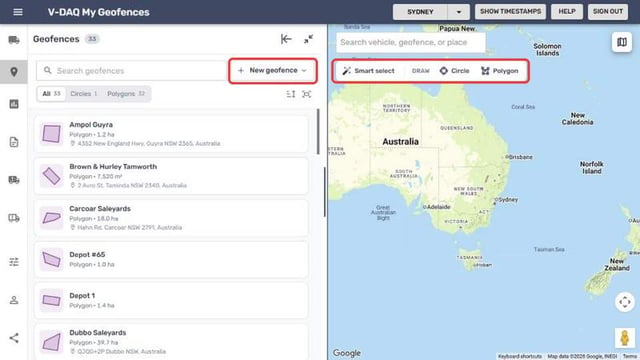
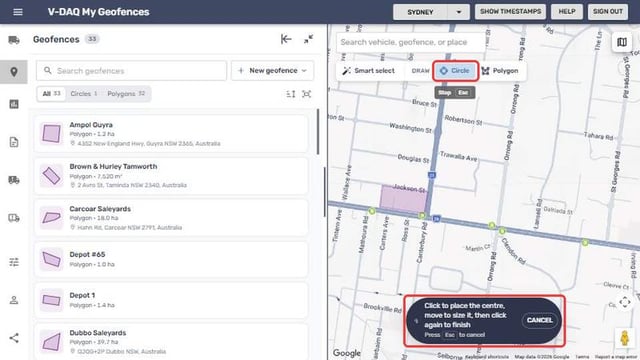
Step 3 – Choose a Drawing Tool
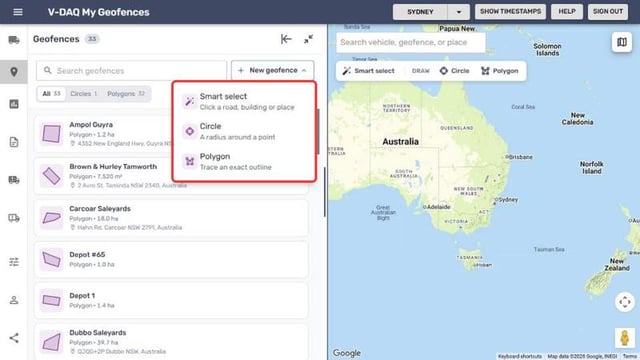
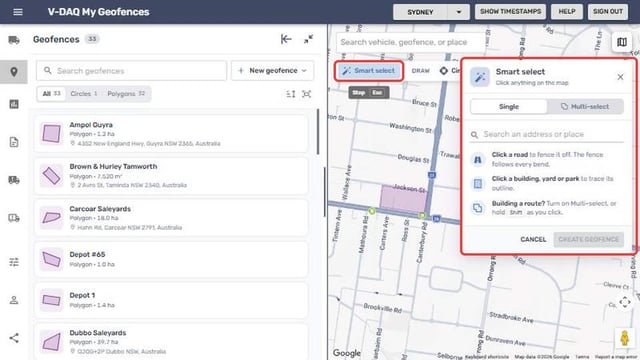
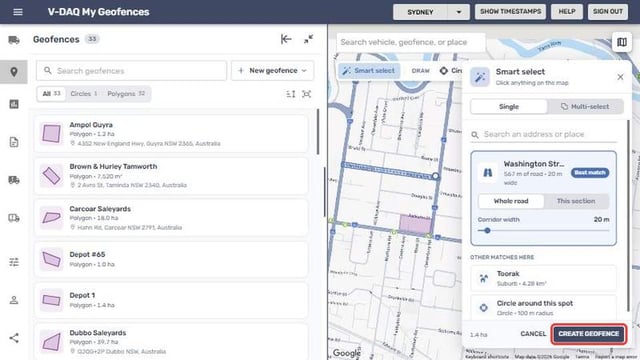
- Smart select (S): click a road, building or place and the outline is built for you. You can also search for an address.
- Circle (C): click to place the centre, move the mouse to size it, then click again.
- Polygon (P): click to add each corner, then click the first corner or press Enter to finish.
Step 4 – Adjust a Smart Select Outline
When you click a road, choose Whole road or This section and set the Corridor width (20 m by default).
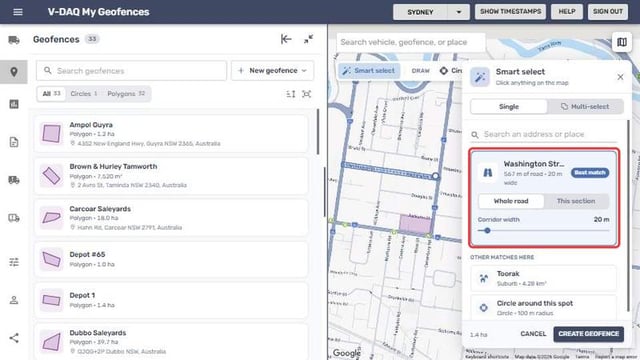
- Include surroundings grows a building or area outline by up to 200 m.
- Turn on Multi-select, or hold Shift while clicking, to join several roads and places into one geofence.
- Trim to route cuts each road to the section between your clicks.
Step 5 – Name the Geofence
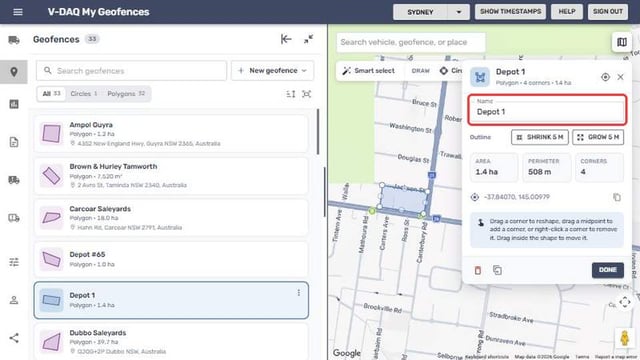
In the Name field, enter a clear name, for example Depot or Customer site. You can also pick a suggested name.
Step 6 – Save the Geofence
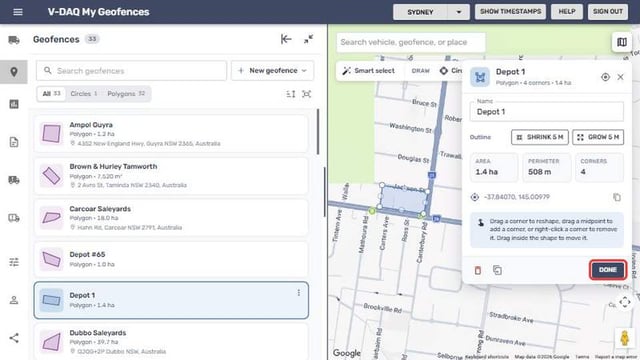
Select Done. With Smart select, select Create geofence.
Rename a Geofence
Step 7 – Open the Editor
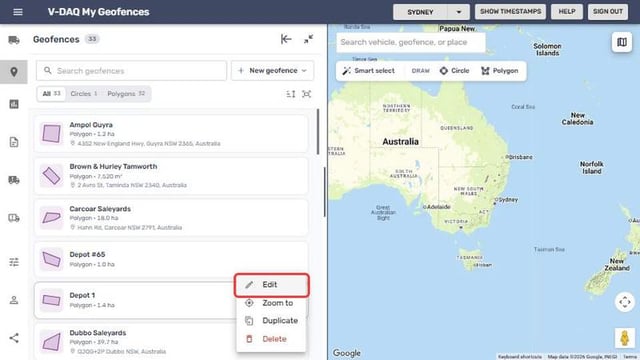
In the list, select the three dots beside the geofence, then Edit.
Step 8 – Change the Name
Change the Name field.
Step 9 – Save the Change
Select Done.
Remove a Geofence
Step 10 – Open the Actions Menu
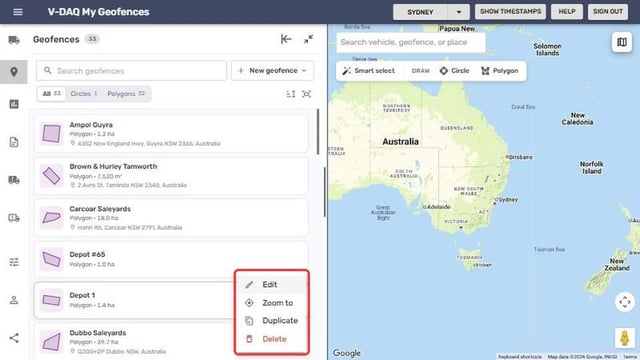
In the list, select the three dots beside the geofence.
Step 11 – Delete the Geofence
Select Delete, then confirm when asked. You can also select the bin icon on the geofence card.
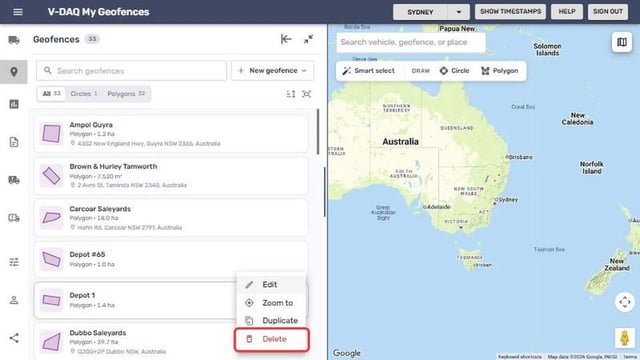
Note: Deleting a geofence can't be undone. Reports and events that use it stop recording entries and exits.
Related Articles
Need More Help?
If you're still experiencing issues:
Phone: (02) 4204 8472
Email: support@v-daq.com.au